

We tried many different thumb clusters. At first we had no idea what would work at all. We tried different block-style thumb clusters like Maltron and Kinesis Advantage.
We then tried two rows of 1u keycaps in various configurations. They worked fairly well, if the block is oriented so that it’s perpendicular to the thumb. However, our tests showed that the thumb either tended to bump into the upper row middle key, or alternatively the outer keys were hard to reach.

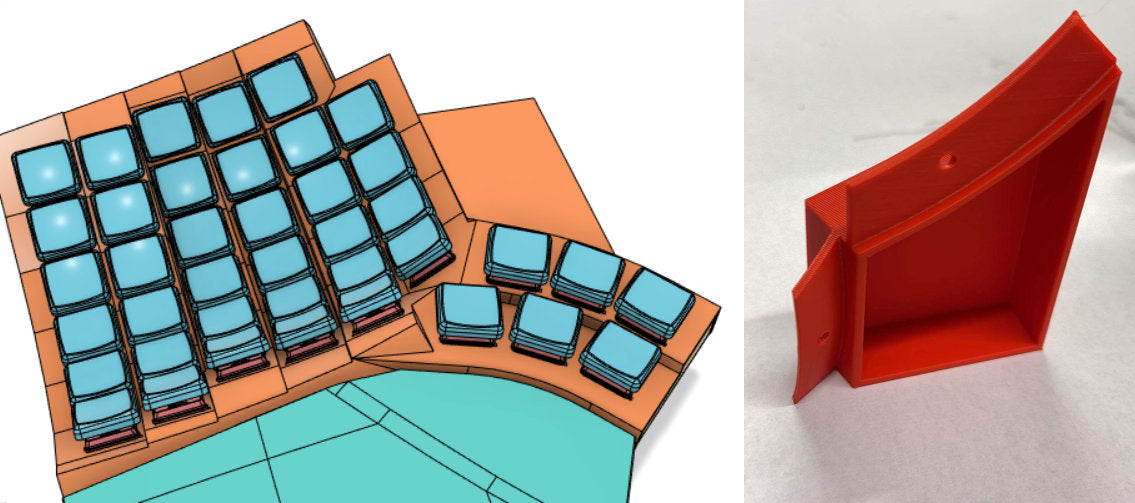
An early experimental 2 + 3 two-row thumb cluster, that we could easily move and rotate to explore the best position
The configuration that worked best was two rows of 3 keys each. Trying to figure out why, we realized it is all about the sweeping motion of the thumb. The two-row 3+3 block works well because it can be positioned so that the thumb can reach each of the bottom row keys by sweeping out a nearly-straightened thumb without moving the palm.
Once we understood how the two-row thumb cluster works, the next steps for improvements were clear:
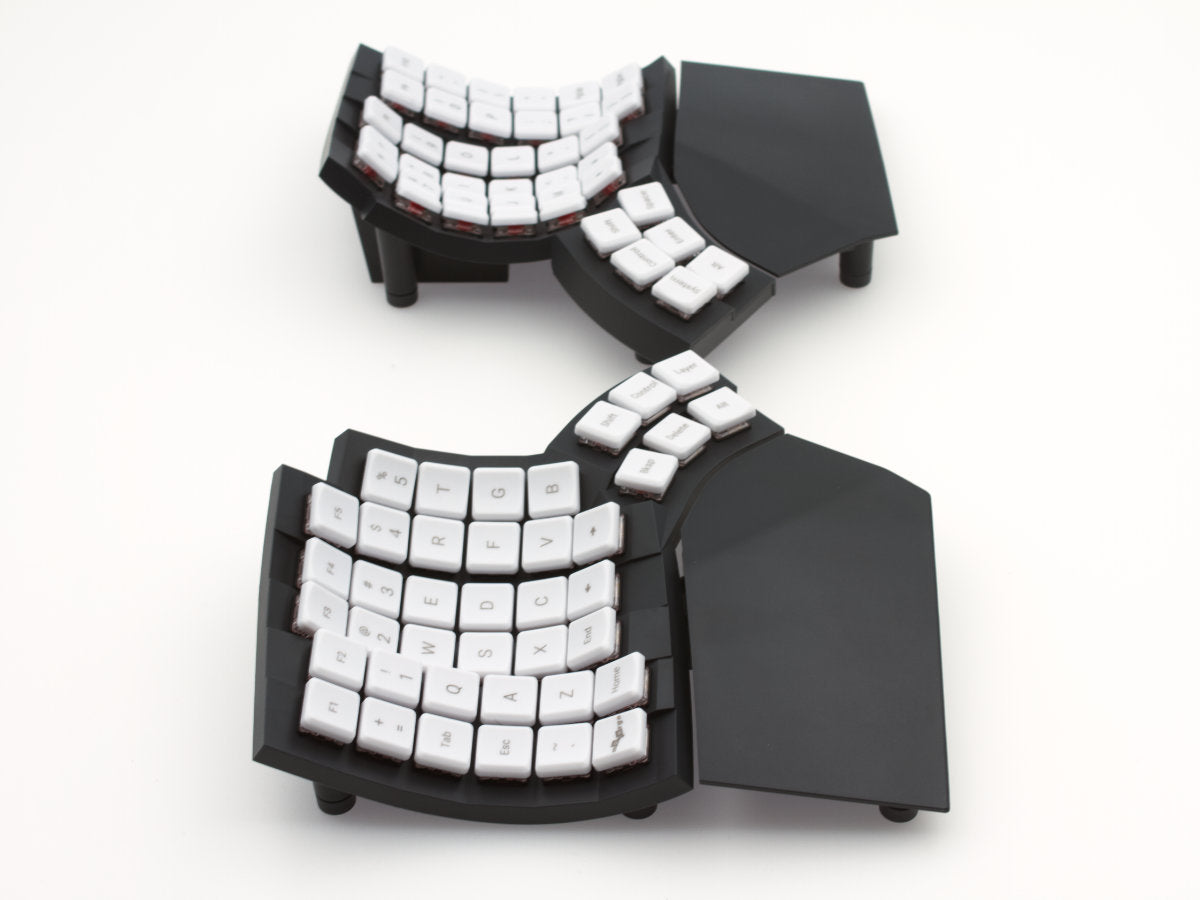
This forms the basis of the Glove80 curved two-row thumb cluster, which was then further refined by lots more empirical testing. Some particular aspects that took a lot of iteration to get right were the spacing and tilt for each row, and the amount of staggering between the top and bottom rows.
At the beginning of the Glove80 journey, we tried to design each ergonomic element independently. We ended up with what seemed like a comfortable keywell and a curved two-row thumb cluster. Then we decided to add the palm rest. A surprise awaited us.
The first palm rest gave us wrist pain after a second day of use. We were surprised, as we did not expect the palm rest design to be complicated. We continued to iterate on the design, and the palm rest progressively became more comfortable.

Just how hard can it be to design a palm rest?
However, it soon became obvious that the keywell design that was comfortable without the palm rest was suboptimal with palm rests. With the change in hand position and angle from the improved palm rest, keys were no longer as easily accessible as they had been from the original simple palm rest. We had to re-optimize many elements of the keywell design.
This is a good illustration of how good ergonomics needs a holistic approach, and how each ergonomic factor interacts with all others, sometimes in surprising ways.
One of the most important ergonomic factors for keyboards is the position of the arms and wrists. The common advice is that the forearm be held roughly horizontally, and never tilting upwards, and the wrist should not be bent backwards, since this limits the blood flow and is a common cause of wrist pain.
Most keyboards, including many ergonomic keyboards, make this position difficult to achieve: they have a positive tilt, which forces the wrist to bend upwards. This is something that we refused to compromise on with our Glove80 prototype: we designed it with a neutral tilt, so that the wrist is neither bent upwards nor downwards when typing.
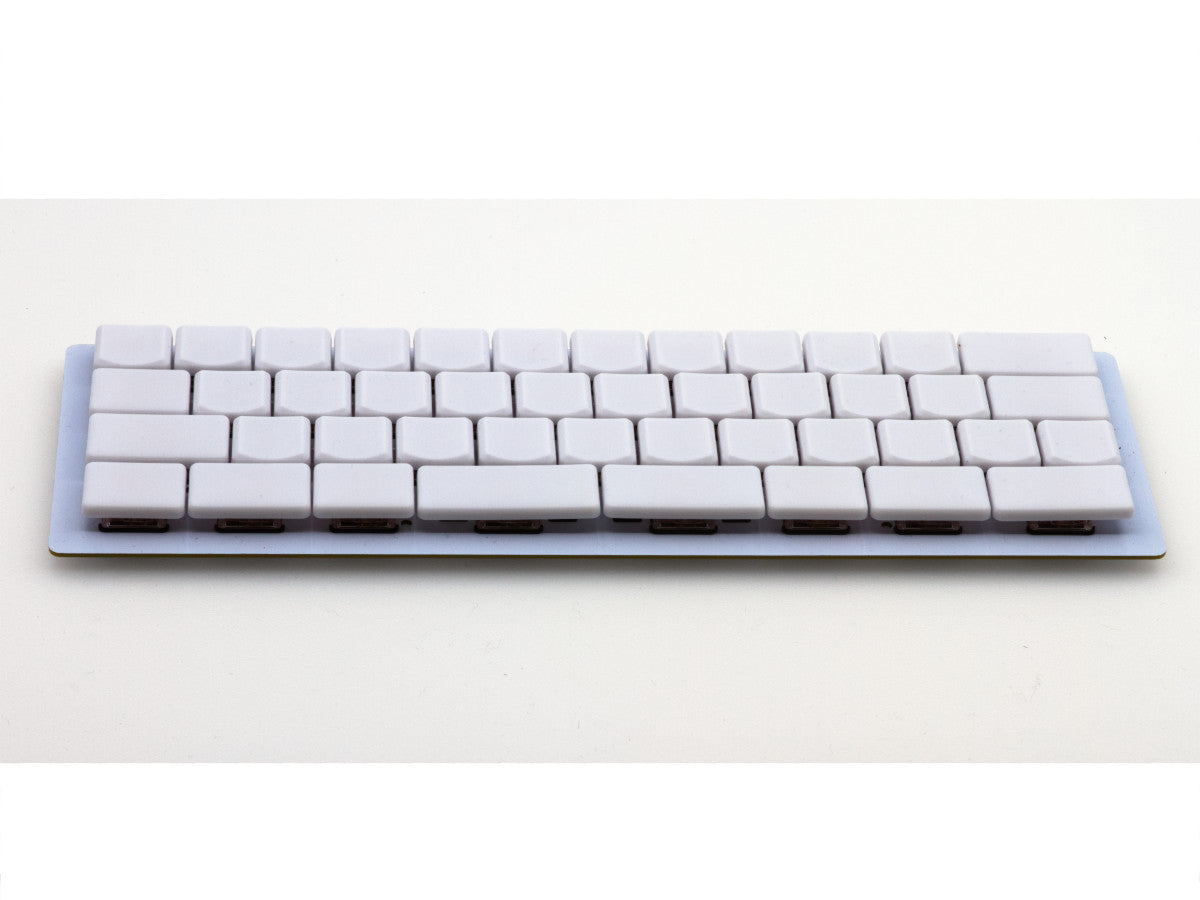
To allow for both a horizontal arm position and neutral wrist position, the keyboard – specifically the top of the keycaps – needs to be low enough. Unfortunately, the amount of space between your hands and your thigh is extremely limited – and that space needs to accommodate the table, the keyboard and still leave enough wriggle room for your legs. This was a problem for the Glove80 prototype. Its neutral tilt was very comfortable to type on, but it was simply too tall to use on most non-adjustable office tables.

Height comparison of the MX-switch Glove80 prototype and the production Choc-switch Glove80

Height comparison of Glove80 and Kinesis Advantage
We came to the conclusion that to keep the neutral tilt on Glove80, we needed to do everything possible to minimize the keyboard height:
This required drastic re-engineering of the whole keyboard, while retaining exactly the same ergonomics. The lowest keys are the home row keys for the middle fingers: ‘D’ and ‘K’ for a qwerty layout. After the redesign, the top of the keycaps of these two keys is a mere 20 mm above the desk (including keycaps, keyswitch, case and feet). For reference, an MX key switch with no key cap is 19mm alone.
We all have different hand sizes, different typing habits and we use different applications. Glove80 celebrates customizability and with the ZMK firmware made it easy to customize the keyboard layout on the software level. To accommodate this on the hardware level, we decided to use a uniform keycap profile that allows the keycaps to be easily rearranged to match custom layouts, i.e. every key uses the same shape of keycap.
The MBK keycaps we started with were nice for the main keywell, but did not work well for the Glove80 thumb keys. They cut into the thumb, so what we needed was a cylindrical profile. That's why we ended up designing our own keycap profile: MoErgo Choc Cylindrical (MCC).

Glove80 knows how to party too
We wanted a minimal look for the production Glove80, so we decided to hide the LED indicators behind the keyswitches. To achieve this, we made our MCC keycaps using translucent POM material. This also allowed us to easily extend our plans for a few indicator LEDs into support for full RGB backlighting. Like with the keyboard itself, it took many iterations to get the POM material just right with translucency and ability to laser mark legends, but POM’s wonderful buttery-smooth typing feel is absolutely worth it.
Looking forward, Chris and I have many extension ideas to make Glove80 even more comfortable and useful. Glove80 is designed to be extensible, with a GPIO extension header and various mounting points for accessories. We will be working on some of these ideas, and we expect our users to come up with many cool solutions too.

Template sidecar expansion module to attach to Glove80. You can add switches, dial indicators, display, touchpad or whatever you fancy
Special mounting is another area that we will focus on. Although Glove80 already supports many mounting methods, we believe there is much further to go. Wireless, split and custom mounting is a potent combo that could further ergonomics.
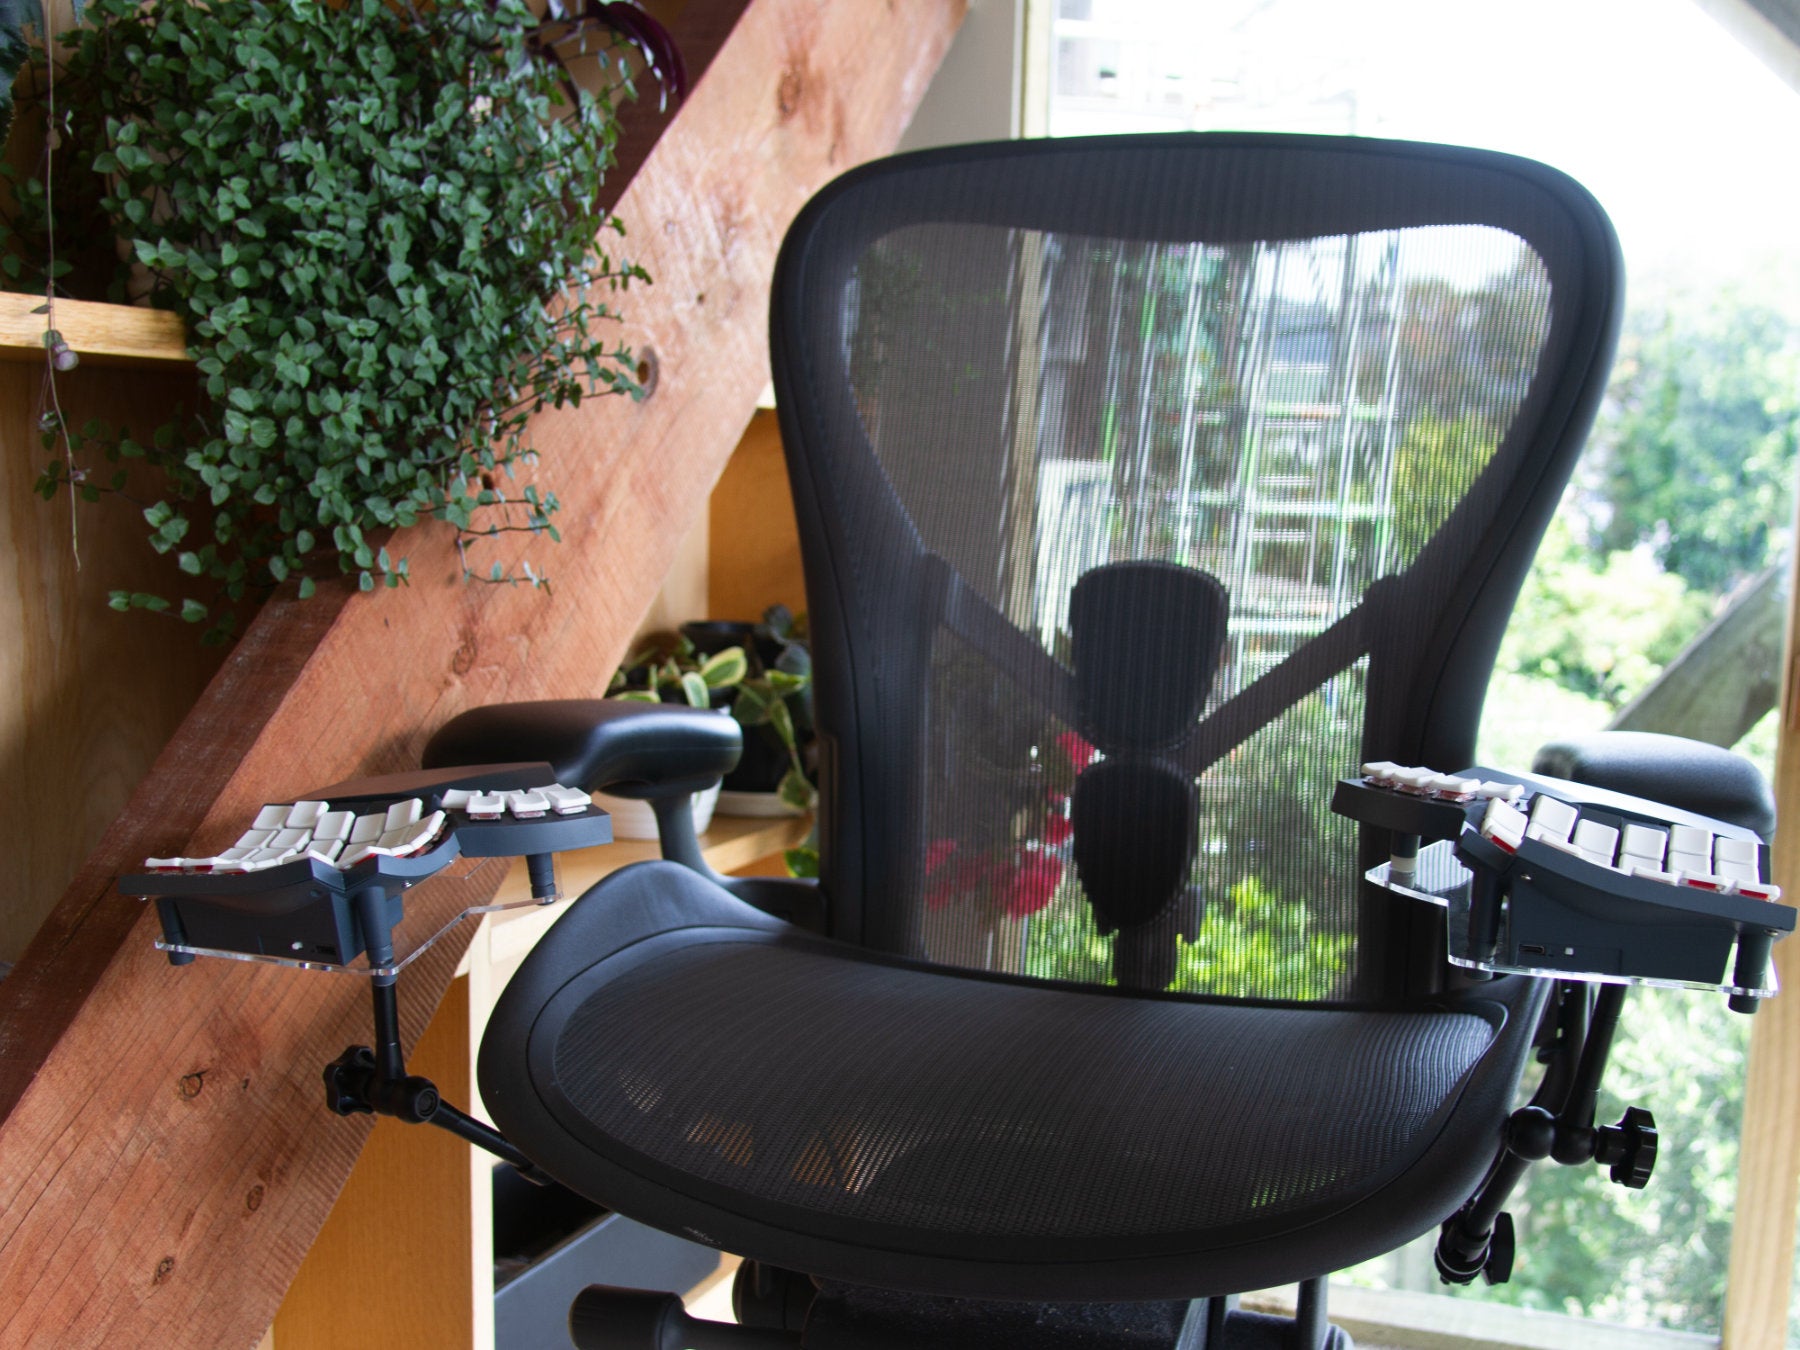
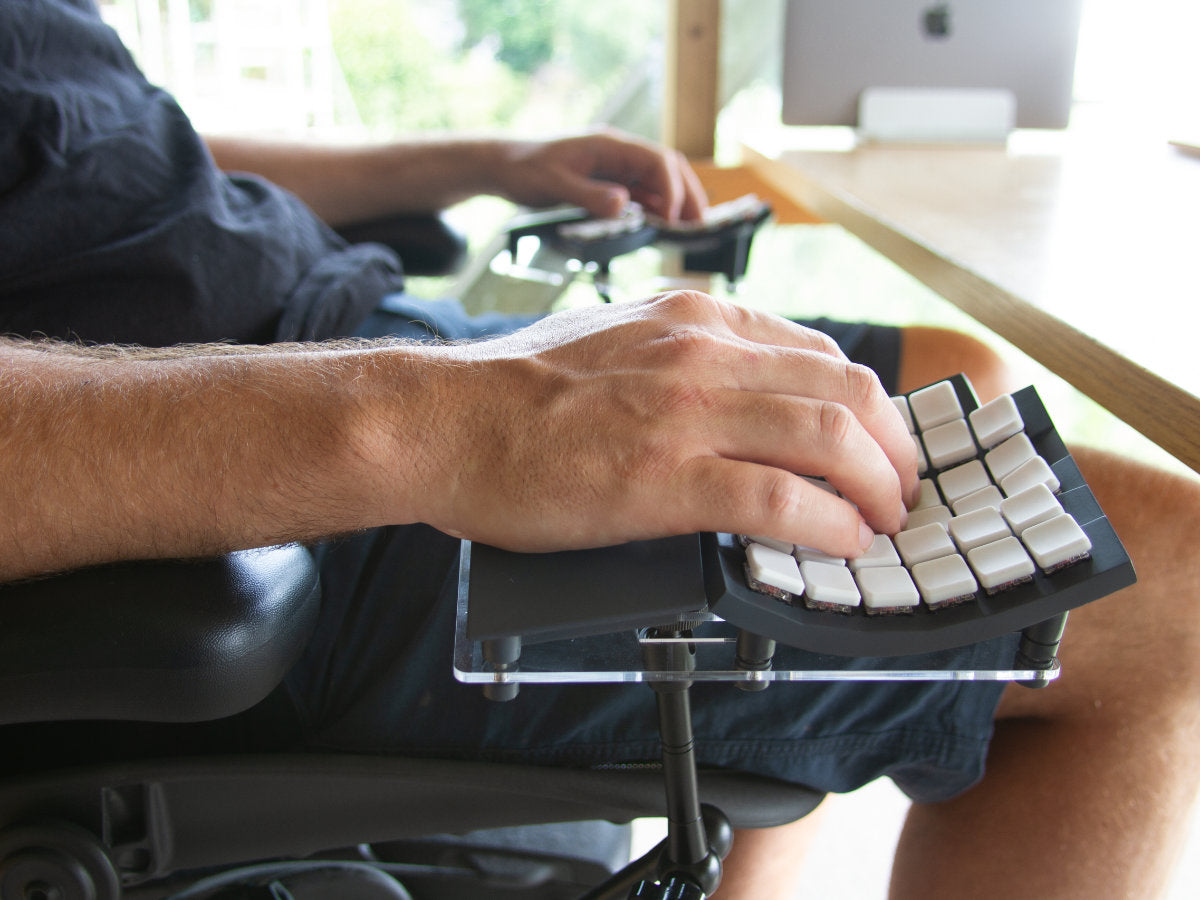
Glove80 mounted on an office chair